How to Choose the Right Construction Machines?
Choosing construction machines is not simply a matter of comparing horsepower or price. The right choice depends on the work, the site, and the people operating the equipment. A 20-ton excavator may suit deep trenching on a stable, open site, yet prove cumbersome on a narrow urban lot. For grading, a compact track loader might offer better maneuverability, while a wheel loader may move more material efficiently across firm ground. Small details matter. Ground conditions, access width, lifting requirements, and daily operating hours can all change what “right” means.
Start by defining the tasks the machine must perform, then check its capacity against the manufacturer’s specifications. Consider reach, payload, attachments, fuel or energy use, transport needs, and maintenance access. Safety features and operator visibility deserve close attention, especially when machines work near crews or confined spaces. Ask dealers about service intervals, parts availability, warranty terms, and local support; verify important claims in the equipment documentation. If possible, arrange a demonstration under conditions similar to your site. A machine that performs well on a showroom surface may feel very different on soft, uneven ground.
Budget for more than the purchase price. Insurance, transport, downtime, repairs, and resale value affect the total cost of ownership. Renting can make sense for short or specialized jobs, though frequent use may favor ownership. There is no perfect checklist. Site plans change, and estimates can be wrong. Review the choice with experienced operators and project managers before committing. A careful decision helps match capability to the job without paying for capacity you rarely use.
Define the Work: Match Machine Type to Load, Reach, and Duty Cycle
Before selecting a construction machine, define the work in measurable terms: the heaviest load, the farthest reach, and how long the machine must operate each shift. A compact loader may move soil efficiently across a firm, open pad, yet struggle with stacked materials or uneven ground. Check the load chart at the actual working radius, not only the machine’s maximum capacity. A boom extended several metres can reduce safe lifting capacity considerably. Include the weight of attachments, pallets, and any material that may shift during handling. Small details matter.
Duty cycle helps narrow the choice. A machine used for a few lifts each hour has different demands from one loading trucks continuously through a full shift. Estimate operating hours, travel distance, surface conditions, and likely waiting time. Then compare fuel or energy use, service intervals, and access for routine checks. On a tight site, turning clearance and setup time can matter as much as rated output. The first estimate is often wrong; revisit it after observing the work area and crew sequence. Recheck the plan before committing.
Size Capacity: Use ISO 14397-1 Criteria to Check Loader Rated Capacity
When choosing a loader, don’t confuse bucket volume with rated operating capacity. ISO 14397-1:2007 specifies how to calculate rated capacity and verify the calculated tipping load through testing. For many wheel loaders, 50% of tipping load is a familiar reference, but machine type and configuration affect the applicable criteria. Check the technical data sheet. Easy to miss.
Compare ratings under the same conditions. A full bucket held low may behave differently from a load raised to truck-bed height. Attachment weight, tire pressure, lift-arm position, and steering angle can all change stability. Confirm whether the published figure includes the installed attachment, and ask for the test configuration if it is unclear. ISO 14397-2 separately describes breakout-force testing; breakout force is not the same as rated capacity.
On site, match the rating to the heaviest material and the furthest practical reach. Wet soil, for example, can add weight quickly, while a longer fork attachment shifts the load forward. Check the load chart before handling pallets or filling a truck. A small margin helps, but it does not replace the ISO-based rating or a site-specific assessment. One more check. Compare the planned load’s weight with the machine’s stated capacity at the actual lift height and reach.
Assess Site Fit: Compare Ground Pressure, Machine Width, and Turning Radius
Choosing a construction machine starts with the ground beneath it. Ground pressure indicates how much load the machine places on each area of ground. On damp soil, a lighter machine or wider tracks may reduce sinking and rutting. But a pressure figure alone cannot predict performance. Soil moisture, slope, and recent rain can change the site quickly.
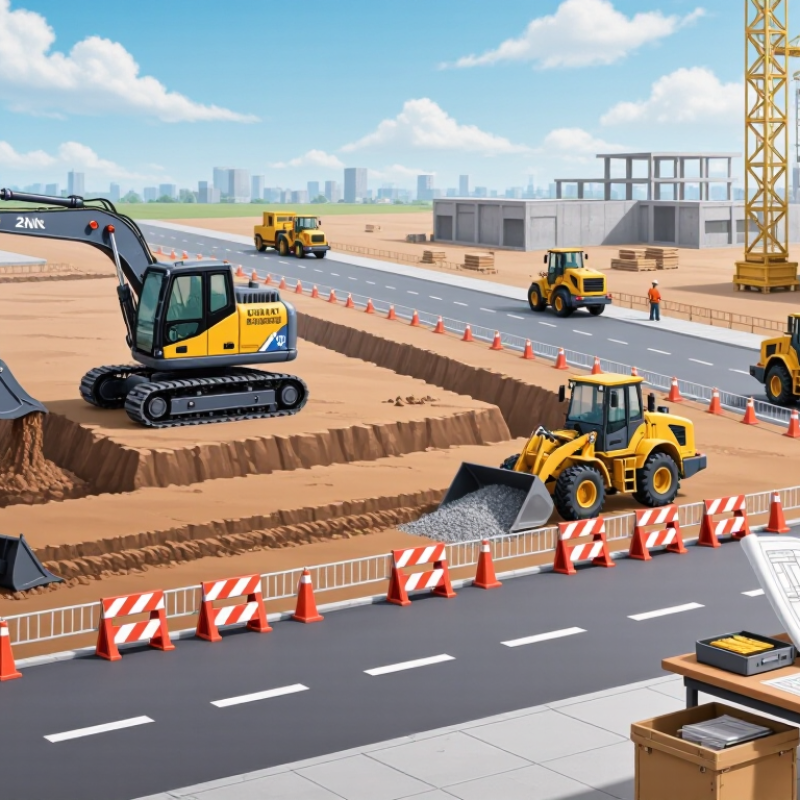
Check the machine’s width against gates, access roads, and the narrowest working space. Measure with attachments fitted, not just the main body. A few extra centimeters can make a tight entrance unusable. Small margins matter. Turning radius deserves the same attention. Mark the machine’s turning path on the ground, especially near trenches, stored materials, or site boundaries. A compact turning radius may save repeated repositioning, though it does not remove blind spots.
Compare these measurements with the actual work area before booking equipment. A scaled site plan helps, but it can miss uneven ground or temporary obstructions. Walk the route and note soft patches, overhead limits, and places where the machine must turn. One detail is easy to overlook: published dimensions may vary with configuration. Confirm the exact setup with the supplier, then leave some working clearance. The first estimate may be wrong. That is worth checking before delivery.
How to Choose the Right Construction Machines?
Assess site fit by comparing ground pressure, machine width, and turning behavior. Lower ground pressure can help reduce soil disturbance, while narrower machines may better suit restricted access.
| Machine Type |
Representative Width |
Turning Behavior |
| Mini excavator |
About 1.4 m |
Turns on its tracks; check tail-swing clearance |
| Compact track loader |
About 1.8 m |
Can counter-rotate; check the full attachment envelope |
| Wheeled skid-steer loader |
About 1.7 m |
Pivot steering; allow room for the machine and attachment |
| Compact wheel loader |
About 2.0 m |
Typical outside turning radius is approximately 3–4 m |
Ground-pressure figures are representative planning estimates: mini excavator 30 kPa, compact track loader 35 kPa, wheeled skid-steer loader 180 kPa, and compact wheel loader 200 kPa. Actual values vary with machine configuration, tires or tracks, and operating load. Confirm specifications and site clearances before selection.
Check Crane Clearances: OSHA Table A Requires 10 ft from Lines Up to 50 kV
How to Choose the Right Construction Machines?
When selecting a crane, check the work area before comparing lifting capacity or reach. OSHA Table A requires at least 10 feet of clearance from power lines rated up to 50 kV. This minimum matters during setup and lifting, when a boom, suspended load, or rigging can swing toward a line. A measured gap on the ground can look generous, yet the load may travel closer once wind or positioning changes.
Confirm the line’s voltage with the utility or site supervisor; never estimate it by appearance. If the voltage is unknown, stop and resolve that uncertainty before operating. Higher voltages require greater clearance, and site conditions may call for more distance than Table A’s minimum. Walk the crane’s planned path, note nearby lines, and account for boom movement and load swing. It is easy to focus on the pick itself and overlook the travel path. That deserves a second look.
Tips: Mark the clearance boundary with visible cones or barriers, assign a dedicated spotter, and review hand signals before the lift. Keep the operator and spotter in clear communication. If conditions change, pause and reassess rather than relying on a quick guess. Safety planning can feel repetitive; that is often the point.
How to Choose the Right Construction Machines? — Check Crane Clearances: OSHA Table A Requires 10 ft from Lines Up to 50 kV
| Power-Line Voltage |
Minimum Clearance |
Practical Equipment Check |
| Up to 50 kV |
10 ft (3.05 m) |
Check the crane, boom, rigging, load, and planned operating position against the clearance limit. |
| Over 50 kV to 200 kV |
15 ft (4.57 m) |
Include boom movement, load swing, and the full work area when selecting equipment and setting its position. |
| Over 200 kV to 350 kV |
20 ft (6.10 m) |
Confirm the crane’s working radius and boom configuration can maintain the required separation. |
| Over 350 kV to 500 kV |
25 ft (7.62 m) |
Plan the lift path and equipment setup so no part of the equipment or load enters the clearance zone. |
| Over 500 kV to 750 kV |
35 ft (10.67 m) |
Verify the line voltage and clearance requirements before choosing the machine or beginning work. |
| Over 750 kV to 1,000 kV |
45 ft (13.72 m) |
Use the specified clearance when assessing the crane’s reach, placement, and planned lift path. |
| Over 1,000 kV |
As established by the utility owner/operator or a qualified registered professional engineer |
Obtain the required clearance determination before operating equipment near the line. |
| Important: OSHA Table A clearances are minimum approach distances for covered crane operations near power lines. Verify voltage and site conditions, and follow applicable OSHA requirements. De-energizing and grounding lines or using other permitted safeguards may affect the applicable requirements. |
Compare Lifecycle Costs: Fuel Use, Utilization, Maintenance, and Cost per Hour
A machine’s purchase price is only the opening line. Compare fuel, scheduled servicing, repairs, and expected resale value across its working life. The U.S. Army Corps of Engineers’ EP 1110-1-8 equipment schedule separates ownership and operating expenses into hourly rates, offering a useful benchmark against a contractor’s own records. Check the schedule for the relevant equipment class and region; conditions and job intensity still matter.
Fuel can quietly reshape the calculation. Use the U.S. Energy Information Administration’s weekly diesel price series for your location, then multiply that price by measured gallons per hour. For example, at $4.00 per gallon, a machine burning 8 gallons an hour costs $32 per operating hour in fuel alone. That is an illustration, not a fleet average. Track idle time separately: an hour on the engine meter may produce little work. Utilization changes the denominator, too. If a machine costs $120,000 annually to own and operate, 1,000 productive hours mean $120 per hour; at 1,500 hours, the figure falls to $80. A spreadsheet can look precise while relying on optimistic utilization. Keep maintenance invoices and fuel logs beside the estimate, and revise it when the job gets tougher. Small gaps compound.